11/04/2019
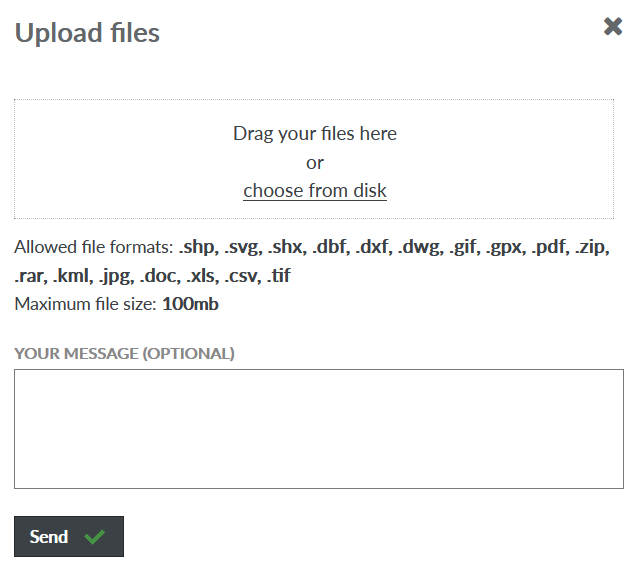
To begin monitoring your farm using satellite data, you first have to add at least one field to your account. This is quite simple. If you already have electronic boundary files for your fields in the form of e.g. shapefiles, send them to us and we will upload your fields for you. To upload your boundaries, click on the “Import” button on the bottom left of the “Fields” tab and drag and drop your files into the box displayed.
If you want to add the fields manually yourself, log in to your account. After logging in you will be shown the Dashboard panel, where you can click on the “add field” ![]() button:
button:
This brings you to the field creation tool, where you can navigate to your part of the world and add your fields to the system.
To add a field, follow these steps:
- Click on the layer icon
 in the upper right of the map in order to choose the base map. The Topographic map is best for quickly finding your area. The satellite imagery base map is more useful for the rest of the process – finding and tracing your field.
 - You can also click the locate icon
 if you are currently near the field you want to add, or click on the magnifying glass icon
  to search for the town nearest to your field.
 - Click the zoom button (or scroll using your mouse) to bring your region into view. You can also press down the Shift key and draw a rectangle in the part of the map you want to inspect.
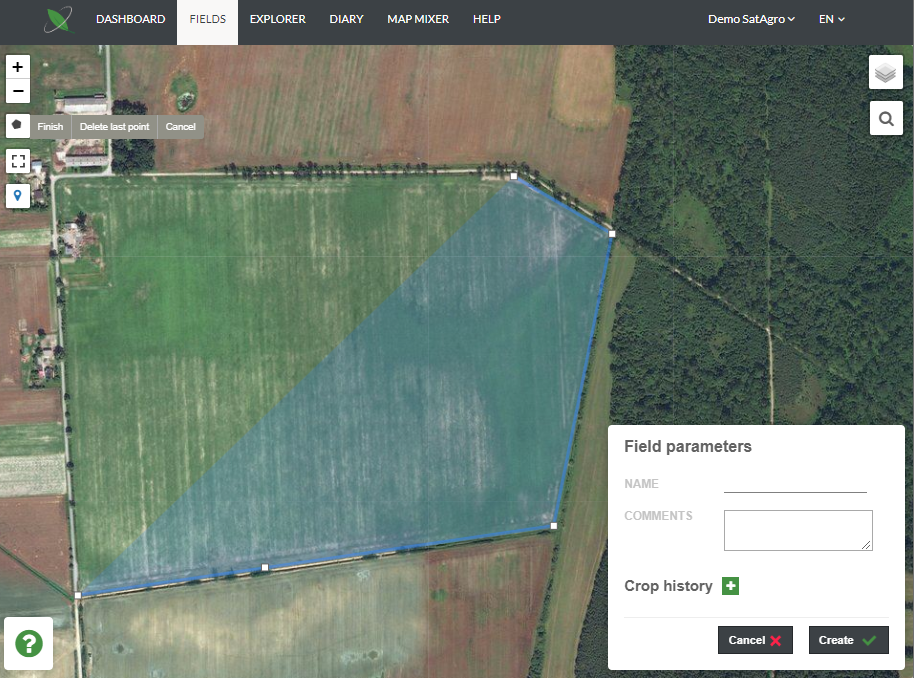
- Click the add field button
 (below the zoom button) to begin tracing the boundaries of your field. Each click on the map sets your fields boundaries. When you have finished tracing your field, click on the first point you set. If you make any mistakes, you can always press Esc or click Cancel.
 - In order to toggle the Full screen view, click the icon
 .
. - Name your field. You can also include a short description.
- Add at least the current crop on your field. First click on the icon
 . This will bring up a new window, where you can add your fields crop history. You can also modify your field’s crop history elsewhere in the app – more about editing crop history can be found in this article.
 - Click the Create button in order to save your new field. The system will ask you for confirmation, upon which you will be sent an email signifying your data is being processed.
Preparing your data involves processing a large number of satellite images. Because of this, the process will take at least an hour. You will be notified when the system is done with your data by email.
 Platforma